AndroidStudio(kotlin)でラジオボタンを2行以上にする方法を考えてみました。ボタンを選ぶと下のテキストが変わる画面を作ってみます。
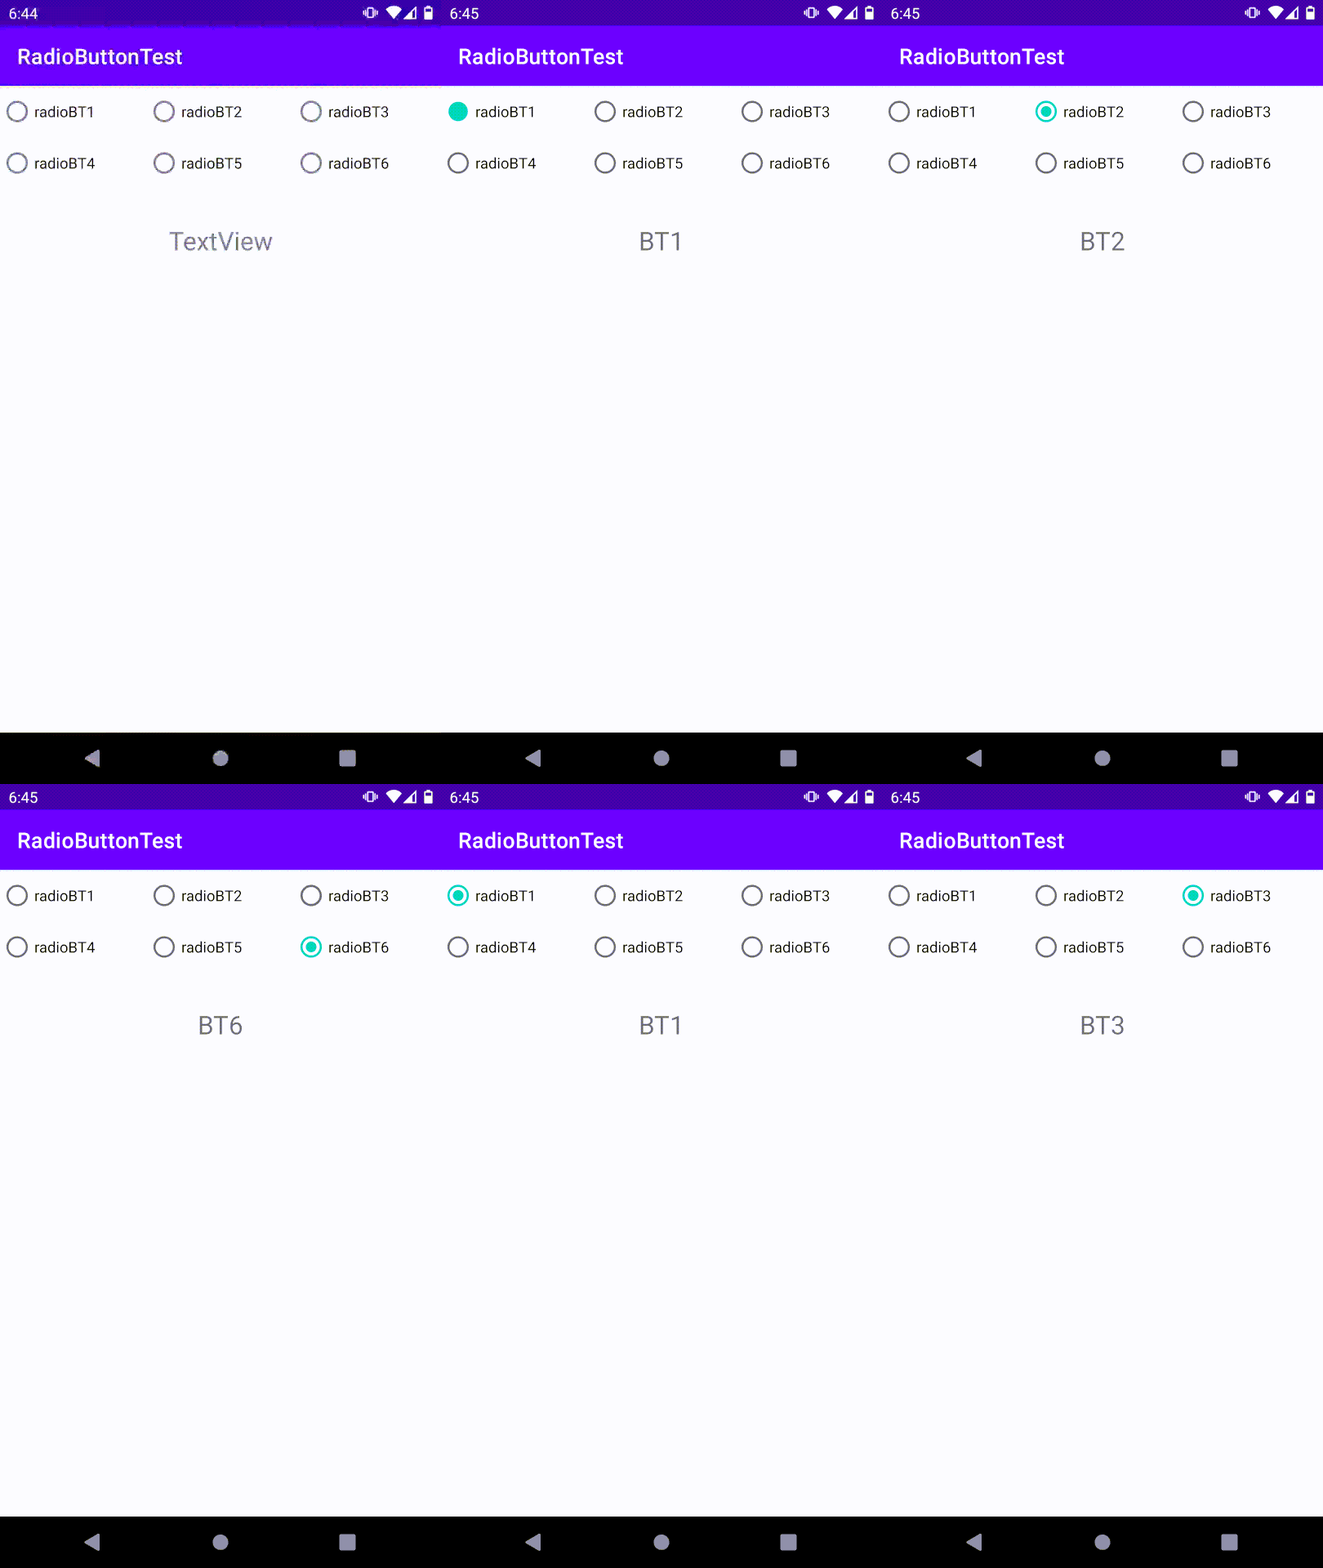
まず画面のレイアウトでRadioGroupを2つ作ります。(orientationをhorizontalにしてます)
その下にテキストビューを配置します。
<?xml version="1.0" encoding="utf-8"?>
<androidx.constraintlayout.widget.ConstraintLayout xmlns:android="http://schemas.android.com/apk/res/android"
    xmlns:app="http://schemas.android.com/apk/res-auto"
    xmlns:tools="http://schemas.android.com/tools"
    android:layout_width="match_parent"
    android:layout_height="match_parent"
    tools:context=".MainActivity">

    <RadioGroup
        android:id="@+id/radioGroup"
        android:layout_width="0dp"
        android:layout_height="wrap_content"
        android:orientation="horizontal"
        app:layout_constraintEnd_toEndOf="parent"
        app:layout_constraintStart_toStartOf="parent"
        app:layout_constraintTop_toTopOf="parent">
        <RadioButton
            android:id="@+id/radioBT1"
            android:layout_width="match_parent"
            android:layout_height="wrap_content"
            android:layout_weight="1"
            android:text="radioBT1" />
        <RadioButton
            android:id="@+id/radioBT2"
            android:layout_width="match_parent"
            android:layout_height="wrap_content"
            android:layout_weight="1"
            android:text="radioBT2" />
        <RadioButton
            android:id="@+id/radioBT3"
            android:layout_width="match_parent"
            android:layout_height="wrap_content"
            android:layout_weight="1"
            android:text="radioBT3" />
    </RadioGroup>

    <RadioGroup
        android:id="@+id/radioGroup2"
        android:layout_width="0dp"
        android:layout_height="wrap_content"
        android:orientation="horizontal"
        app:layout_constraintEnd_toEndOf="parent"
        app:layout_constraintStart_toStartOf="parent"
        app:layout_constraintTop_toBottomOf="@+id/radioGroup">
        <RadioButton
            android:id="@+id/radioBT4"
            android:layout_width="match_parent"
            android:layout_height="wrap_content"
            android:layout_weight="1"
            android:text="radioBT4" />
        <RadioButton
            android:id="@+id/radioBT5"
            android:layout_width="match_parent"
            android:layout_height="wrap_content"
            android:layout_weight="1"
            android:text="radioBT5" />
        <RadioButton
            android:id="@+id/radioBT6"
            android:layout_width="match_parent"
            android:layout_height="wrap_content"
            android:layout_weight="1"
            android:text="radioBT6" />
    </RadioGroup>

    <TextView
        android:id="@+id/textView"
        android:layout_width="wrap_content"
        android:layout_height="wrap_content"
        android:layout_marginTop="32dp"
        android:text="TextView"
        android:textSize="24sp"
        app:layout_constraintEnd_toEndOf="parent"
        app:layout_constraintStart_toStartOf="parent"
        app:layout_constraintTop_toBottomOf="@+id/radioGroup2" />

</androidx.constraintlayout.widget.ConstraintLayout>
このままだと当然RadioGroupは別々に動きます。
なので、setOnCheckedChangeListenerを使い、片方のグループにチェックを入れたときにもう片方のグループのチェックが全部外れるようにします。
この時、片方のチェックを全部外すとそれに反応してまたもう片方が全部チェックを外して、またそれに反応して…とループになってしまうようです。
そこでif文を追加し、変数testがtrueのときだけsetOnCheckedChangeListenerが反応するようにします。
以下が、そのコードです。
(import文等は省略)

class MainActivity : AppCompatActivity() {
    override fun onCreate(savedInstanceState: Bundle?) {
        super.onCreate(savedInstanceState)
        setContentView(R.layout.activity_main)

        var test = true
        radioGroup.setOnCheckedChangeListener { group, checkedId ->
            if (test == true){
                test = false
                radioGroup2.clearCheck()
                when(checkedId) {
                    R.id.radioBT1 -> textView.text = "BT1"
                    R.id.radioBT2 -> textView.text = "BT2"
                    R.id.radioBT3 -> textView.text = "BT3"
                }
                test = true
            }
        }
        radioGroup2.setOnCheckedChangeListener { group, checkedId ->
            if (test == true){
                test = false
                radioGroup.clearCheck()
                when(checkedId) {
                    R.id.radioBT4 -> textView.text = "BT4"
                    R.id.radioBT5 -> textView.text = "BT5"
                    R.id.radioBT6 -> textView.text = "BT6"
                }
                test = true
            }
        }
    }
}
ネットで調べるといくつか方法が出てきましたが、どれも初心者の自分には難しくてよくわかりませんでした。
この方法で、なんとかラジオボタンを2行にすることはできました(^_^;)
以下は自分が作ったアプリです。子どもの計算練習、大人の脳トレにいかがでしょうか?
Flashcards for now2 - Apps on Google Play
It is a simple arithmetic flashcards. You can also create your own wordbook.
カルタを2人でしたいときは、こちらもよろしければどうぞ^^
かるた読み札録音再生アプリ - Apps on Google Play
It is an application that records and plays reading cards of karuta. (You can also shuffle!)










コメント